AUTUMN MAKING
Fabric pumpkin garland supplies
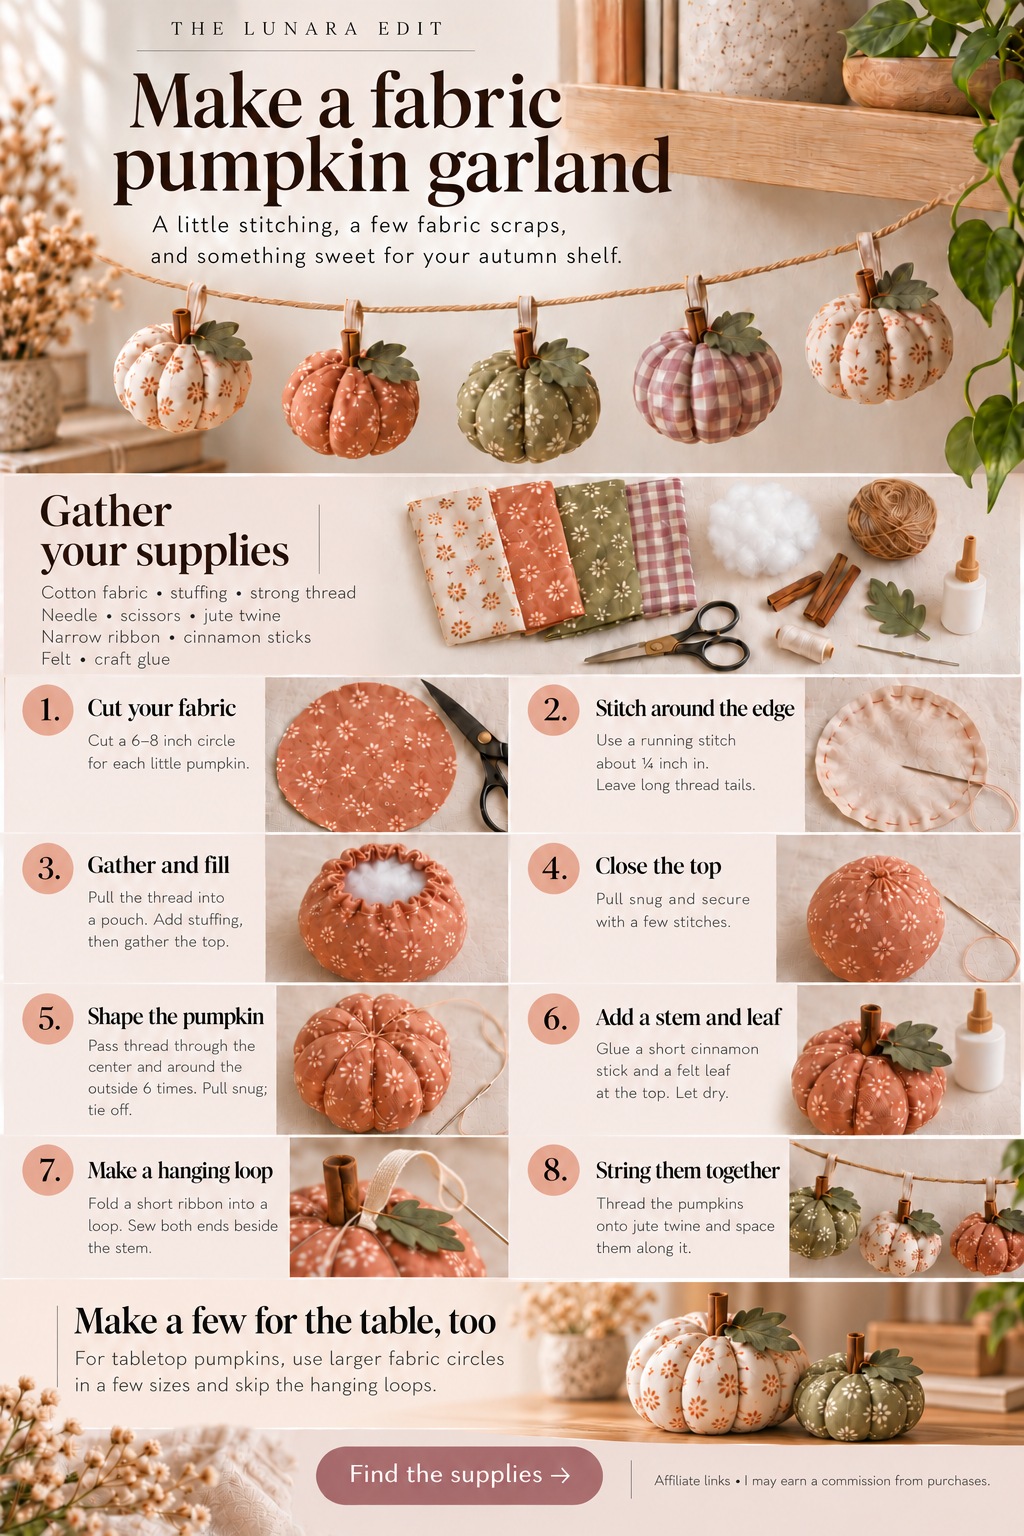
A few little fabric pumpkins look lovely strung along a shelf. Here are the fabric choices and supplies I’ve purchased, along with the sewing steps to keep beside you while you make them.
The products recommended here are ones I have personally used. Links marked “paid link” may earn me a commission when you buy, at no extra cost to you. As an Amazon Associate I earn from qualifying purchases.
Choose your fabric and gather the supplies
Mix a small floral print with gingham or a solid color, or use fabric scraps you already have. You’ll also need a needle, strong thread, cinnamon sticks and craft glue.
- Fabric choice 1 (paid link) (opens in a new tab)
- Fabric choice 2 (paid link) (opens in a new tab)
- Fabric choice 3 (paid link) (opens in a new tab)
- Stuffing (paid link) (opens in a new tab)
- Jute twine (paid link) (opens in a new tab)
- Ribbon for the hanging loops (paid link) (opens in a new tab)
- Scissors (paid link) (opens in a new tab)
- Felt for the leaves (paid link) (opens in a new tab)
Keep the steps nearby
Start with 6–8 inch fabric circles for little garland pumpkins. After stuffing and closing each one, use thread to shape the ridges, then add the stem, leaf and ribbon loop.
Make a few for the table, too
Use larger fabric circles in a few sizes and skip the hanging loops. Keep the same gathering and shaping steps, then group the finished pumpkins on a shelf or table.
Keep needles, scissors and small craft pieces away from young children. These pumpkins are decorations; keep them away from candles and other heat sources.