WORK · DESK SETUP
Getting into mechanical keyboards without spending a fortune.
You do not need a $300 board to figure out what feels good under your hands. Start with layout, switches, and cheap keycap profiles. Spend more only after you know what you actually like.
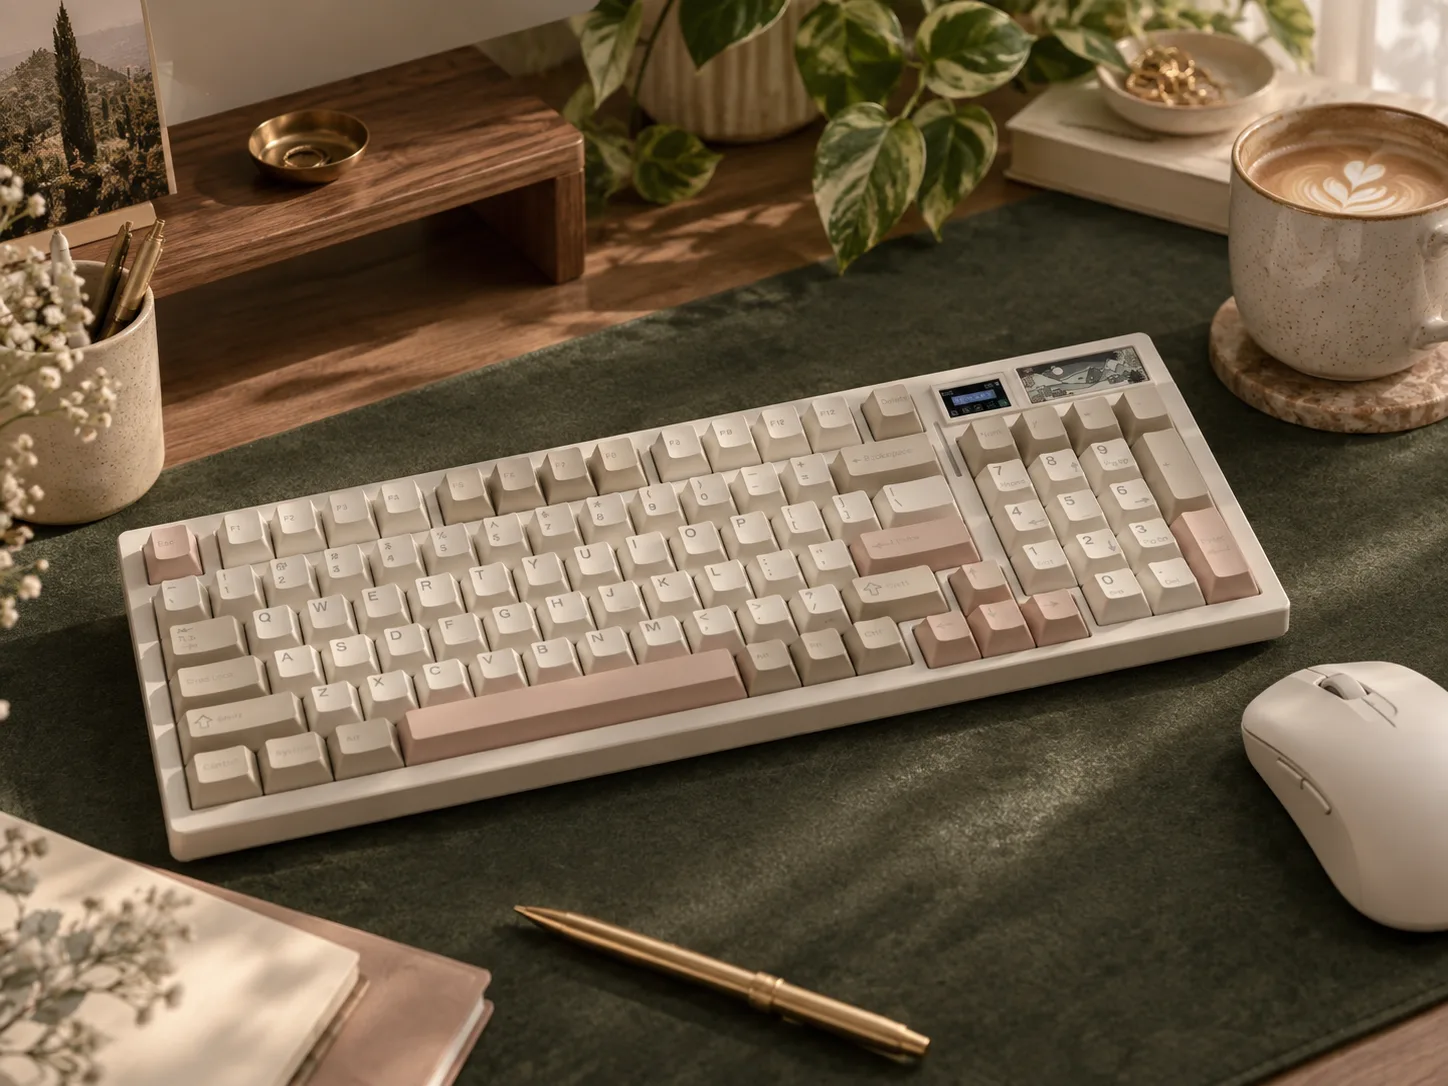
My current favorite middle ground is the YUNZII IF99, but the bigger lesson has been that layout, switches, and keycap shape matter more than the price tag.
Product page →Before you buy a keyboard
Figure out what you want it to feel like.
“Mechanical keyboard” is not one experience. Switches change the press. The board changes the sound. Keycaps change the shape under your fingertips, the sound you hear, and sometimes even how confidently you find the next key. If you are replacing a basic office keyboard, almost any decent mechanical board can feel like a leap. After that, the details start mattering very quickly.
Buy a cheap version first. Type on it for a week. Your fingers will tell you more than a product photo ever will.
1. Start with the layout, because your mouse has to live somewhere too
I like having a numpad. I do not like a full-size keyboard pushing my mouse so far to the right that my shoulder notices by the end of the day. That is why the YUNZII IF99 has been such a good middle ground for me: it keeps the numpad, pulls everything in tighter, and still feels like a normal everyday keyboard rather than a tiny board I have to relearn.
Mine has Cocoa Cream V2 switches, customizable RGB backlighting, the little LCD area at the top, and a swappable magnetic accent. Those extras are fun. The reason I keep using it is much less glamorous: the size makes sense on my desk.
2. Then choose the switch feel
Linear switches move straight down and tend to feel smooth. Tactile switches give you a noticeable bump. Clicky switches add an audible click on purpose. None of these is objectively better. The useful question is whether you want a smooth press, a little physical feedback, or a keyboard that cheerfully announces every sentence.
If you have no idea yet, I would start inexpensive here too. A hot-swappable board lets you change switches later without replacing the whole keyboard, which is much nicer than discovering your expensive first choice annoys you.
3. Keycap profile can change more than the way the keyboard looks
Profile is the height and shape of the keycaps. OEM and Cherry are sculpted: each row has a slightly different height and angle that helps guide your hands across the board. XDA, DSA, MOA, and Osume’s Marshmallow profile are examples of more uniform shapes, where the rows feel much more alike.
That can absolutely affect typing. I loved the rounded MOA caps under my fingertips, but I had a harder time feeling where the home row was without looking. I typed a little slower on them. That does not make MOA bad; it means my hands use the shape of a sculpted keyboard as a landmark more than I realized. Someone else may prefer the freedom of a uniform profile immediately.
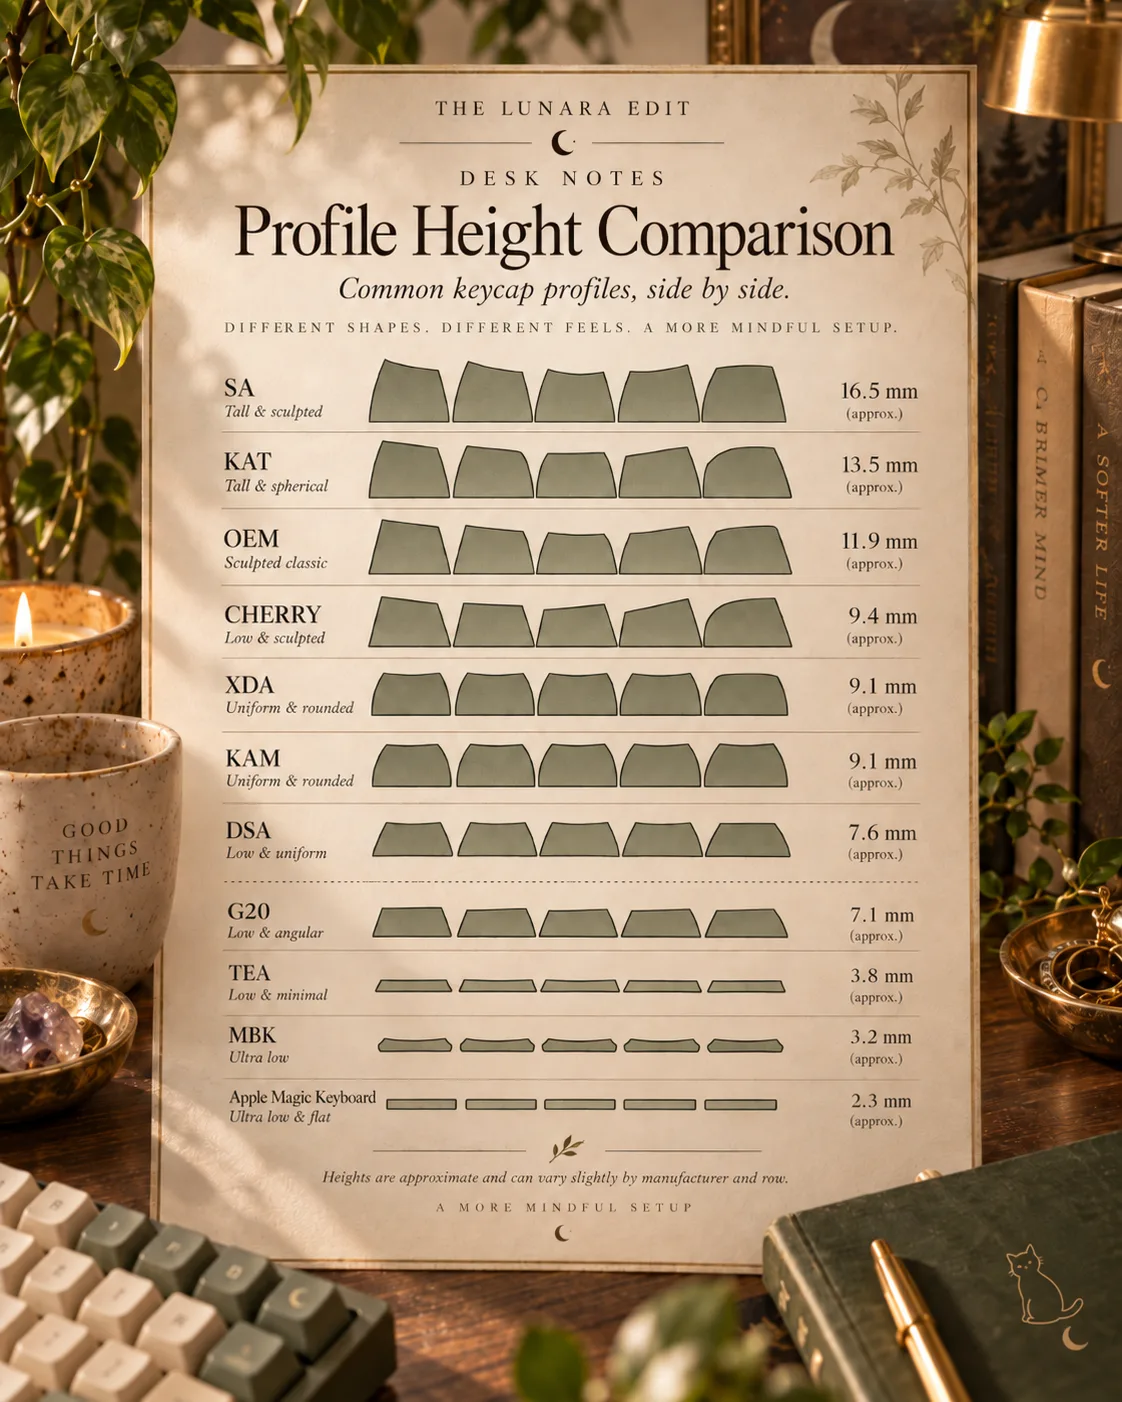
| Profile | Height | Shape |
|---|---|---|
| SA | 16.5 mm | Tall & sculpted |
| KAT | 13.5 mm | Tall & spherical |
| OEM | 11.9 mm | Sculpted classic — what most stock boards ship with |
| Cherry | 9.4 mm | Low & sculpted |
| XDA | 9.1 mm | Uniform & rounded |
| KAM | 9.1 mm | Uniform & rounded |
| DSA | 7.6 mm | Low & uniform |
| G20 | 7.1 mm | Low & angular |
| TEA | 3.8 mm | Low & minimal |
| MBK | 3.2 mm | Ultra low |
| Apple Magic Keyboard | 2.3 mm | Ultra low & flat — for reference |
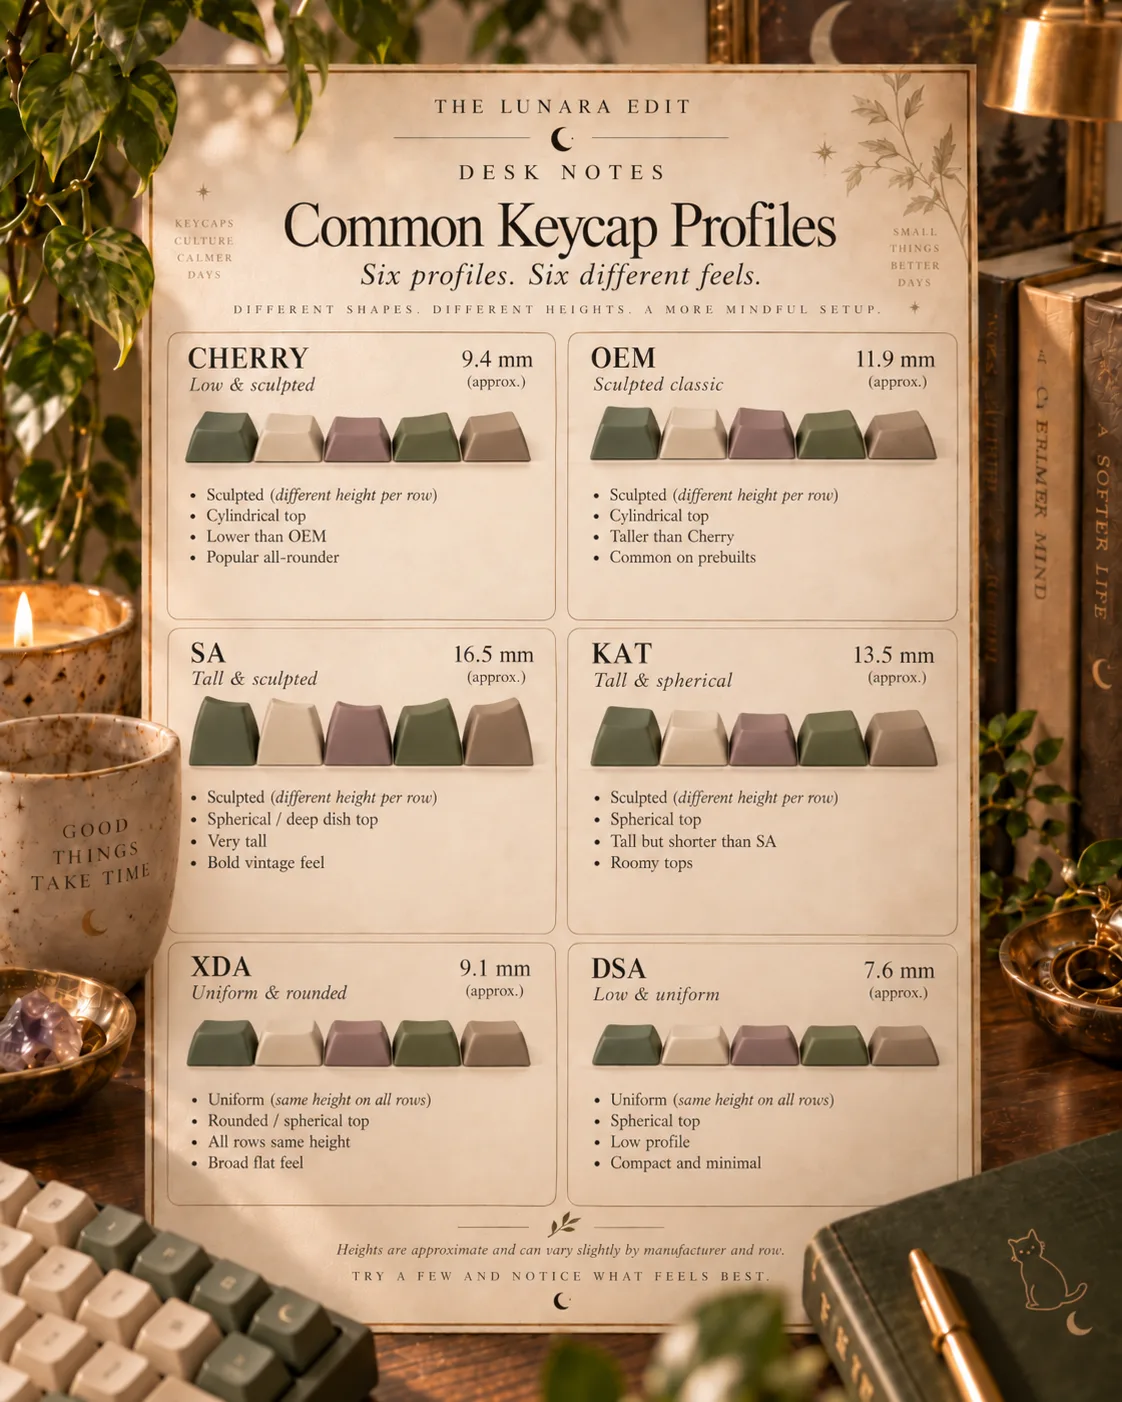
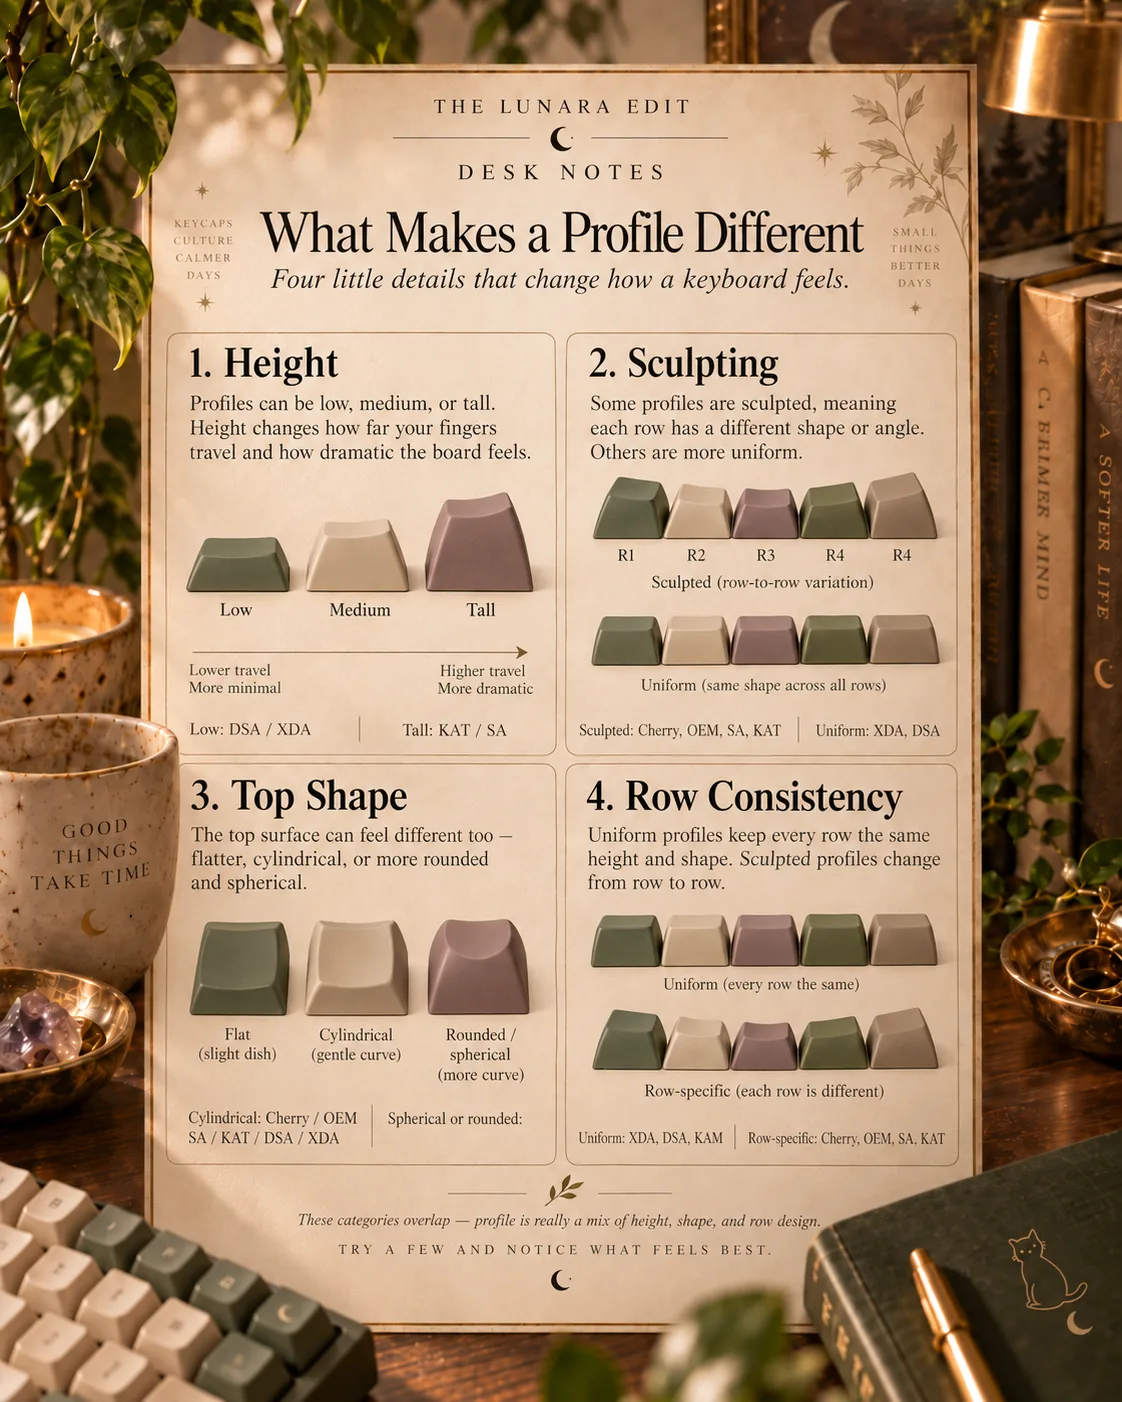
Four things actually separate one profile from another: how tall it is, whether the rows are sculpted or all the same, whether the top of the cap is flat, cylindrical, or spherical, and whether every row is identical. Everything else is decoration.
And what you get out of those differences comes down to four things you will actually notice: how it feels under your fingers, how the board sounds, how it looks, and whether your hands are comfortable after a long day. Sound is the one people overstate — profile influences it, but switches, plate, case, and foam matter at least as much.
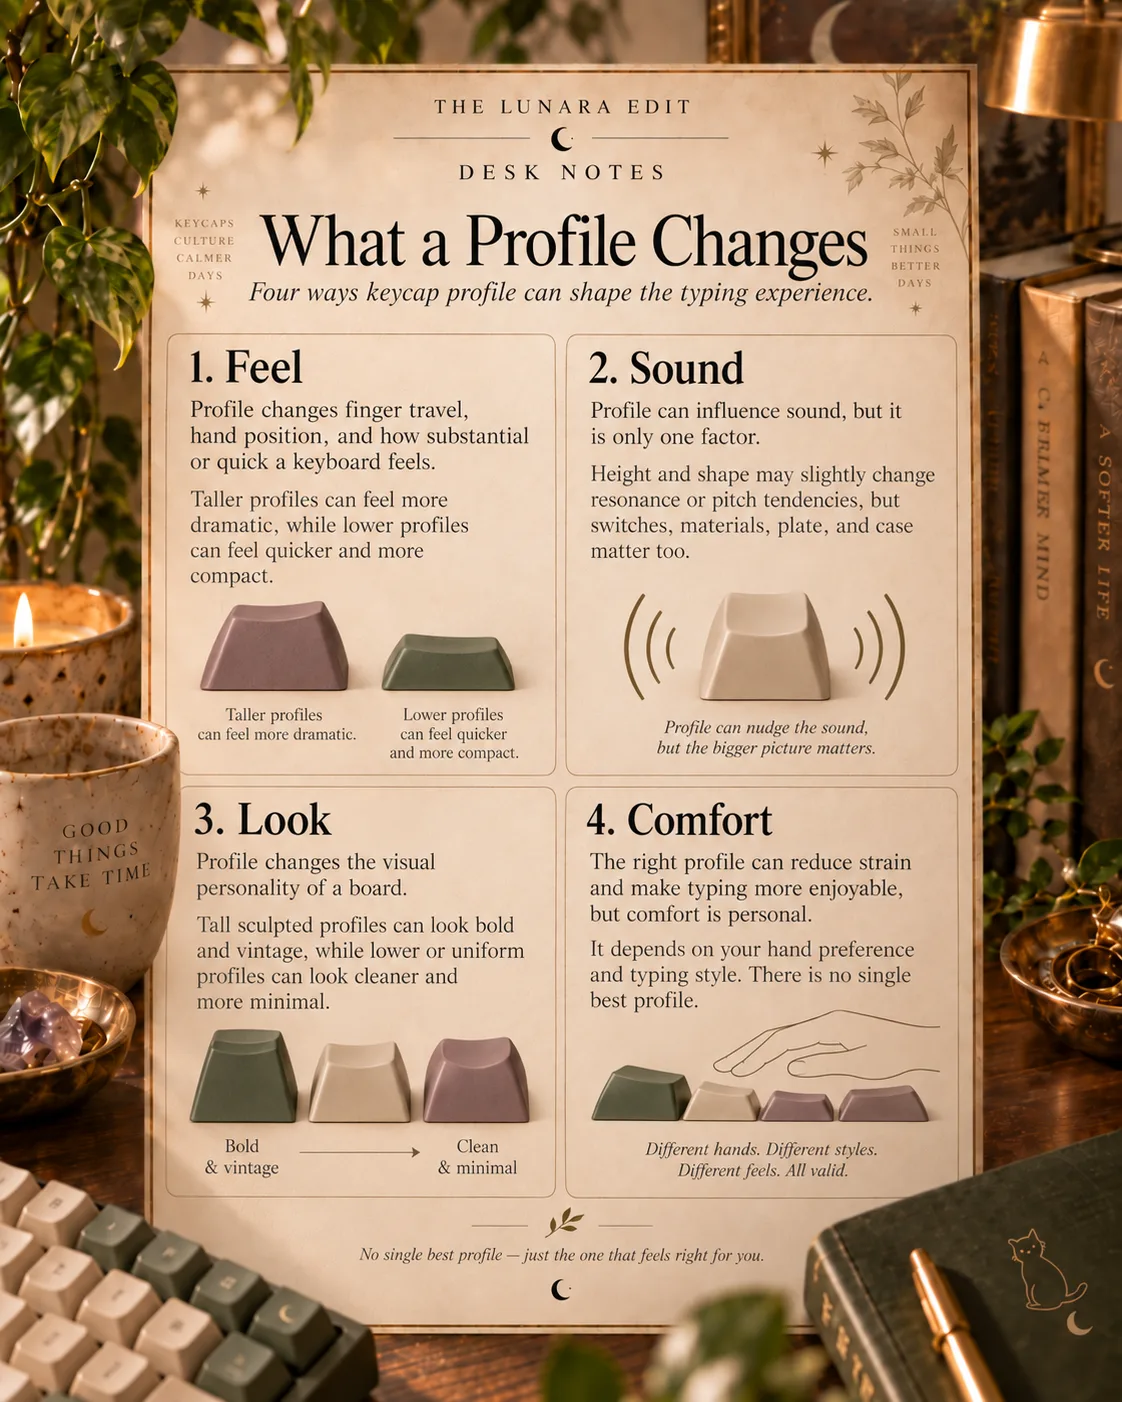

The $20 version can tell you whether your fingers like the shape just as effectively as the $100 version. Once you know the answer, then go buy the beautiful set you actually want.
4. Yes, keycaps can change the sound too
A keycap is part of the little acoustic system you are hitting hundreds or thousands of times a day. Height, shape, wall thickness, plastic, and internal volume can all shift the sound. Taller or heavier caps can move a board toward a deeper or more resonant sound; thinner caps can sound brighter. The effect can be obvious on one board and subtle on another.
The important bit is that keycaps are only one ingredient. Switches, plate material, case construction, foam, stabilizers, mounting style, and even the desk underneath the keyboard matter too. So I would deeply distrust anyone promising that one set of caps will make every keyboard “thock.”
5. A cheap profile tour is smarter than guessing
If you are new to this, I would rather see you spend $15–$30 on a couple of very different profiles than drop premium money on one set because the colorway was perfect. You can resell, reuse, or keep the cheap sets around for another board later.
- OEM: the familiar baseline. A lot of stock boards already use it.
- Cherry: lower and sculpted; a very good profile to try if you type a lot.
- XDA: wide, flat, and uniform; useful contrast if you want to feel what “uniform” really means.
- MOA: taller, rounded, and uniform; wonderfully soft under the fingers, but very different from Cherry/OEM.
- TYRIXKI Rainbow Candy MOA — the inexpensive MOA set I actually used.
- Womier PBT keycap sets — an inexpensive place to try a sculpted profile before spending more.
- KBDfans in-stock keycaps — useful for browsing different shapes and profiles once you know what you want to compare.
- SUEHIODHY Fruit Theme MOA PBT keycaps — a 124-key minimalist white, dye-sublimated MOA set if you want another inexpensive uniform-profile experiment.
Prices and stock move around constantly. I care more about using these as inexpensive profile experiments than recommending one exact colorway forever. Check that the kit includes the odd-sized keys your board needs before buying.
6. Material matters, but not in a dramatic internet-forum way
PBT is popular because it tends to resist the polished shine that develops on some ABS caps over time, and it often has a slightly drier texture. ABS is not automatically cheap or bad; plenty of very good keycaps use it. Thickness, profile, and the rest of the keyboard can matter just as much to the sound and feel.
- Layout first: do you need a numpad, arrows, function row, or navigation cluster?
- Switch type: linear, tactile, or clicky
- Hot-swap sockets if you want to change switches later
- Keycap profile before keycap price
- Kit compatibility — especially spacebars, right Shift, numpad, and other nonstandard keys
- Real typing videos for sound, preferably on a board similar to yours
- Buying a premium keycap set before you know whether you like its profile
- Buying switches by color name without checking whether they are linear, tactile, or clicky
- Assuming expensive automatically means quieter, deeper, or nicer
- Trying to recreate someone else’s exact sound without their exact board, plate, foam, switches, and caps
The stuff I have actually used
There are hundreds of perfectly reasonable keyboards and keycaps I have not touched. These are the ones I can talk about from my own desk instead of pretending a spec sheet is personal experience.
Affiliate note: Some Amazon links below are affiliate links, which means I may earn a commission if you buy through them at no extra cost to you. As an Amazon Associate I earn from qualifying purchases.
My favorite layout so far when I want a numpad. Compact enough that the mouse stays somewhere normal, but not so stripped down that I miss keys all day. Mine uses Cocoa Cream V2 switches.
See the IF99 →Cute, inexpensive, rounded, and genuinely nice under the fingers. They were also the set that taught me that a profile can slow me down a little if I cannot feel the home row as naturally.
See the MOA set →The prettier splurge. This is where I would spend more after you already know you like the profile and want the design, finish, and whole experience — not where I would start the experiment.
See Café Rose →The option for someone who wants good tactility and sound without turning the keyboard into a hobby. Ready-made, straightforward, and a useful reminder that hot-swap customization is optional.
See the Logitech →Make it feel like yours, not like somebody else’s keyboard video.
A keyboard is one of the rare desk upgrades you physically interact with thousands of times a day. I would rather have a $70 board that fits my hands, desk, and habits than a $300 board that technically wins a forum argument. Start cheap enough to experiment. Notice what your hands keep telling you. Then spend money on the parts you have already learned you care about.