HOME · DIY
DIY linen book covers for a calmer, prettier bookshelf.
A simple way to make the books your family actually uses feel more at home in the room around them — without replacing them, hiding them, or turning the shelf into decoration you cannot touch.
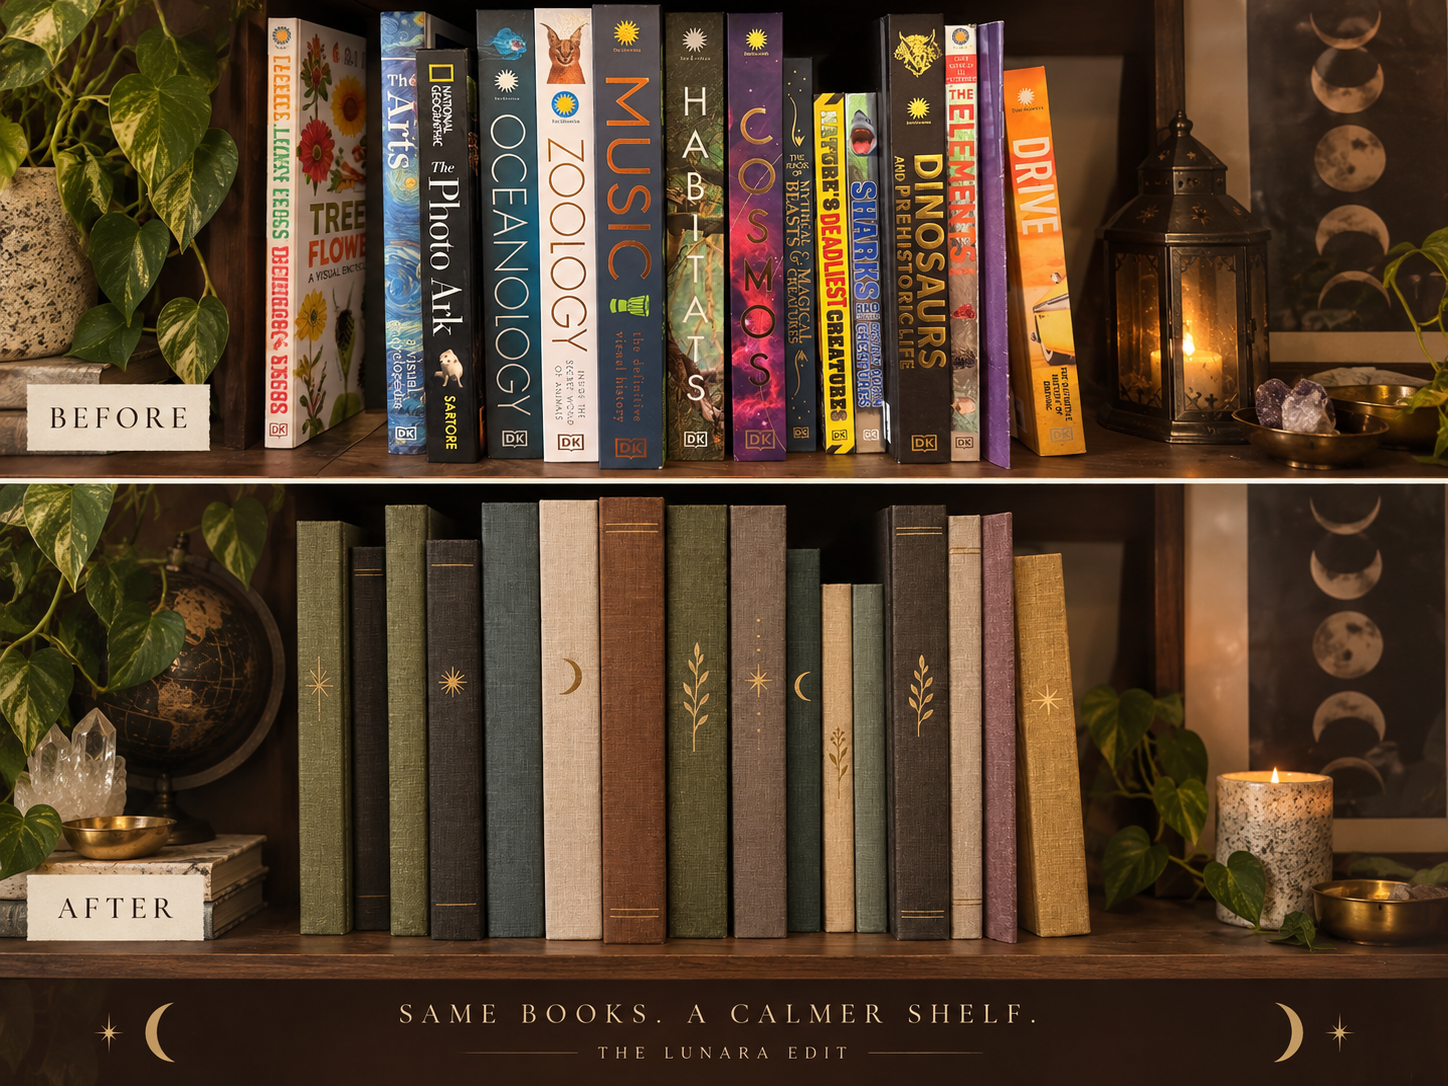
Homeschool books, reference books, journals, and well-loved hardcovers can all stay exactly where they are. A few wrapped covers are often enough to make the whole shelf feel more intentional.
A small visual fix for a very real shelf
The books are not the problem.
A family bookshelf tends to collect everything at once: bright educational books, nature guides, old hardcovers, journals, workbooks, reference books, and whatever someone is currently obsessed with. That is good. It means the shelf is being used.
It can also be a lot to look at. Every glossy spine, logo, color, and typeface asks for attention at the same time. Covering a handful of books in linen or another material gives the eye somewhere quieter to land without getting rid of anything useful.
A few wrapped books mixed with ordinary hardcovers, paperbacks, notebooks, and reference books feels more collected than a perfectly matching wall of beige spines. Start with the loudest few and stop when the shelf feels balanced.
What you’ll need
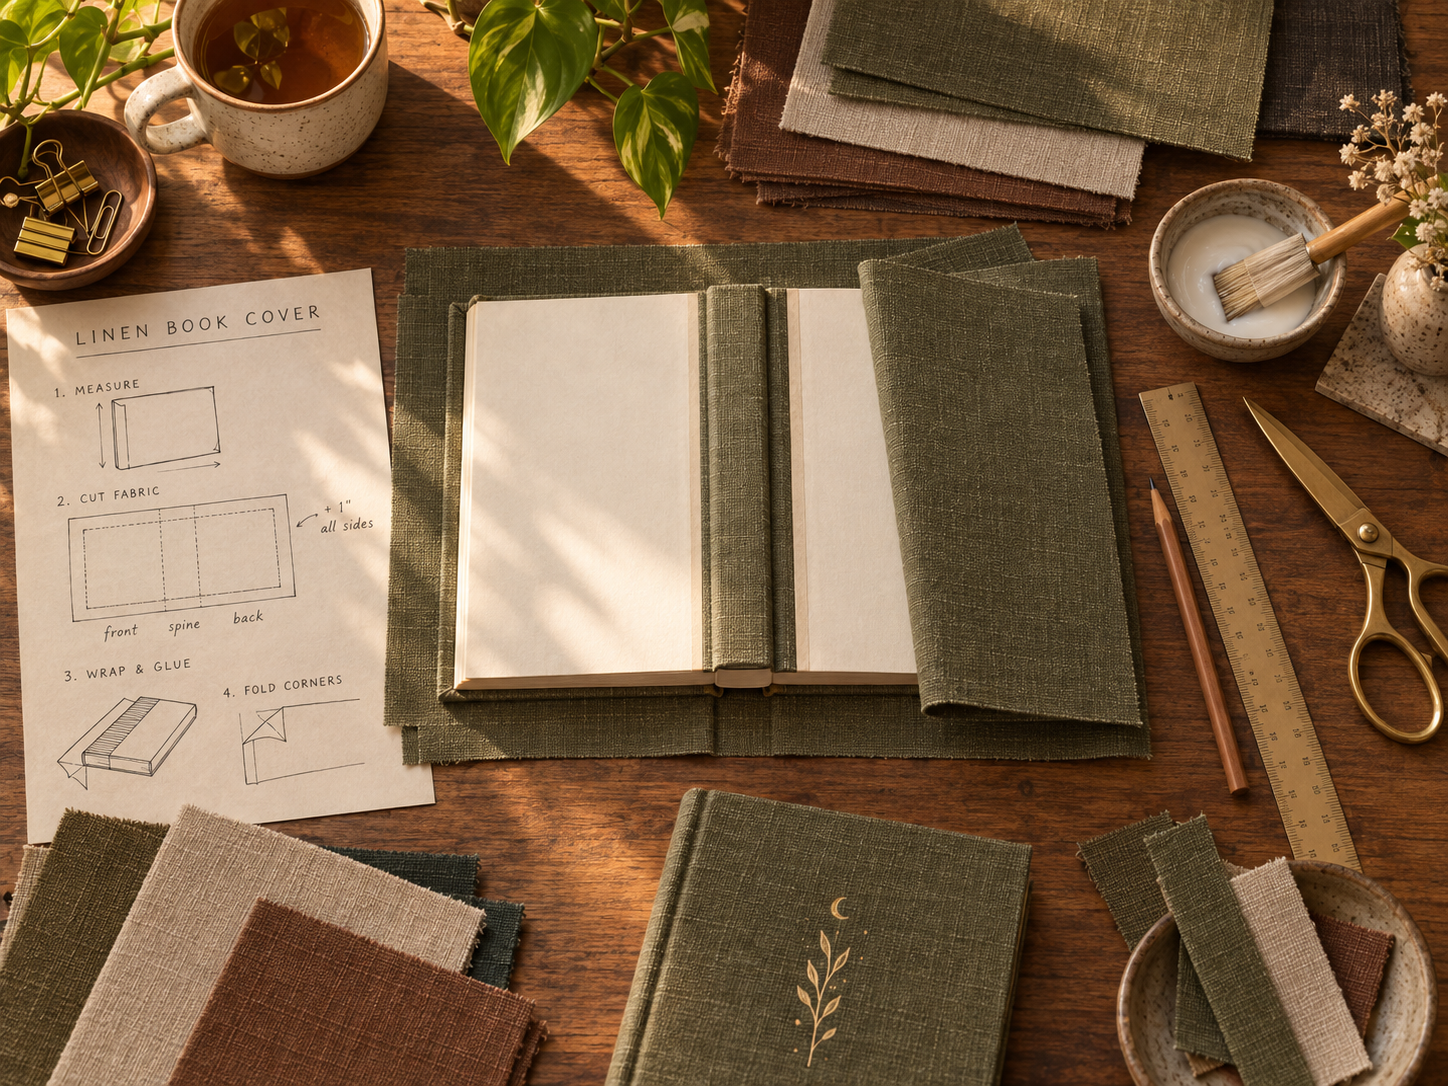
- Hardcover books
- Linen, linen-blend, bookcloth, or another covering material
- Fabric scissors
- Ruler or measuring tape
- Pencil
- Fabric glue, tacky glue, or a low-temperature glue gun
- Binder clips or paper clips, optional
- Gold paint marker or metallic pen, optional
You can keep this very simple. The only genuinely important parts are a sturdy book, enough covering material to fold inside the boards, and an adhesive that behaves well with the material you chose.
- Linen fabric — option one — a good starting texture for the wrapped look shown here.
- Linen fabric — option two — another fabric choice if you want to compare weave, tone, or price.
- Budget fabric scissors — perfectly fine if this is an occasional project.
- Higher-end fabric scissors — worth it if you cut fabric often and want cleaner, easier cuts.
- Mini glue gun with 30 glue sticks — easier to control around book edges and much easier to store than a full-size gun.
- Flexible measuring tape — handy for books with very different heights and spine widths.
- Binder clips — optional, but useful for holding folded fabric in place while the adhesive sets.
- Metallic paint markers — for the gold lines, moons, stars, and botanical details.
These are Amazon affiliate links, which means I may earn a small commission if you buy through them at no extra cost to you. You do not need these exact products to make the project work; use what you already have where it makes sense.
1. Choose the books
Hardcovers are easiest because the boards give the fabric a firm surface to wrap around. This is especially useful for reference books, older educational books, journals, encyclopedias, and sturdy books you plan to keep for years.
I would skip library books, collectibles, anything valuable in its original condition, and books you know you will want to resell later. For those, use a removable paper or fabric jacket instead of gluing anything to the cover.
2. Measure before you cut
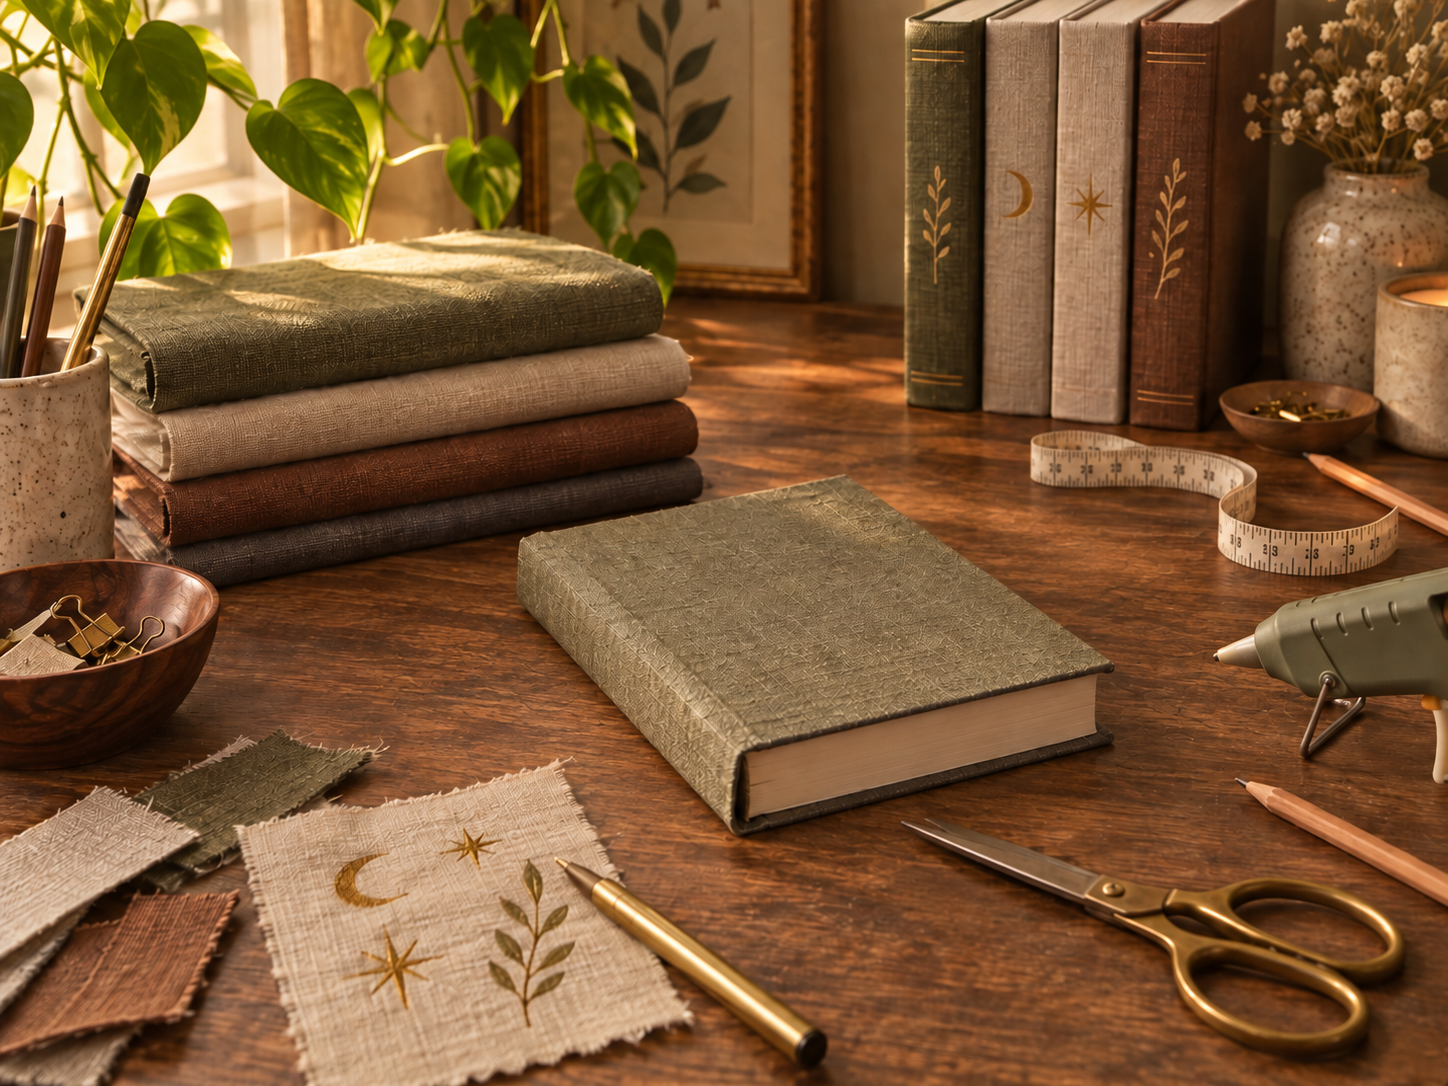
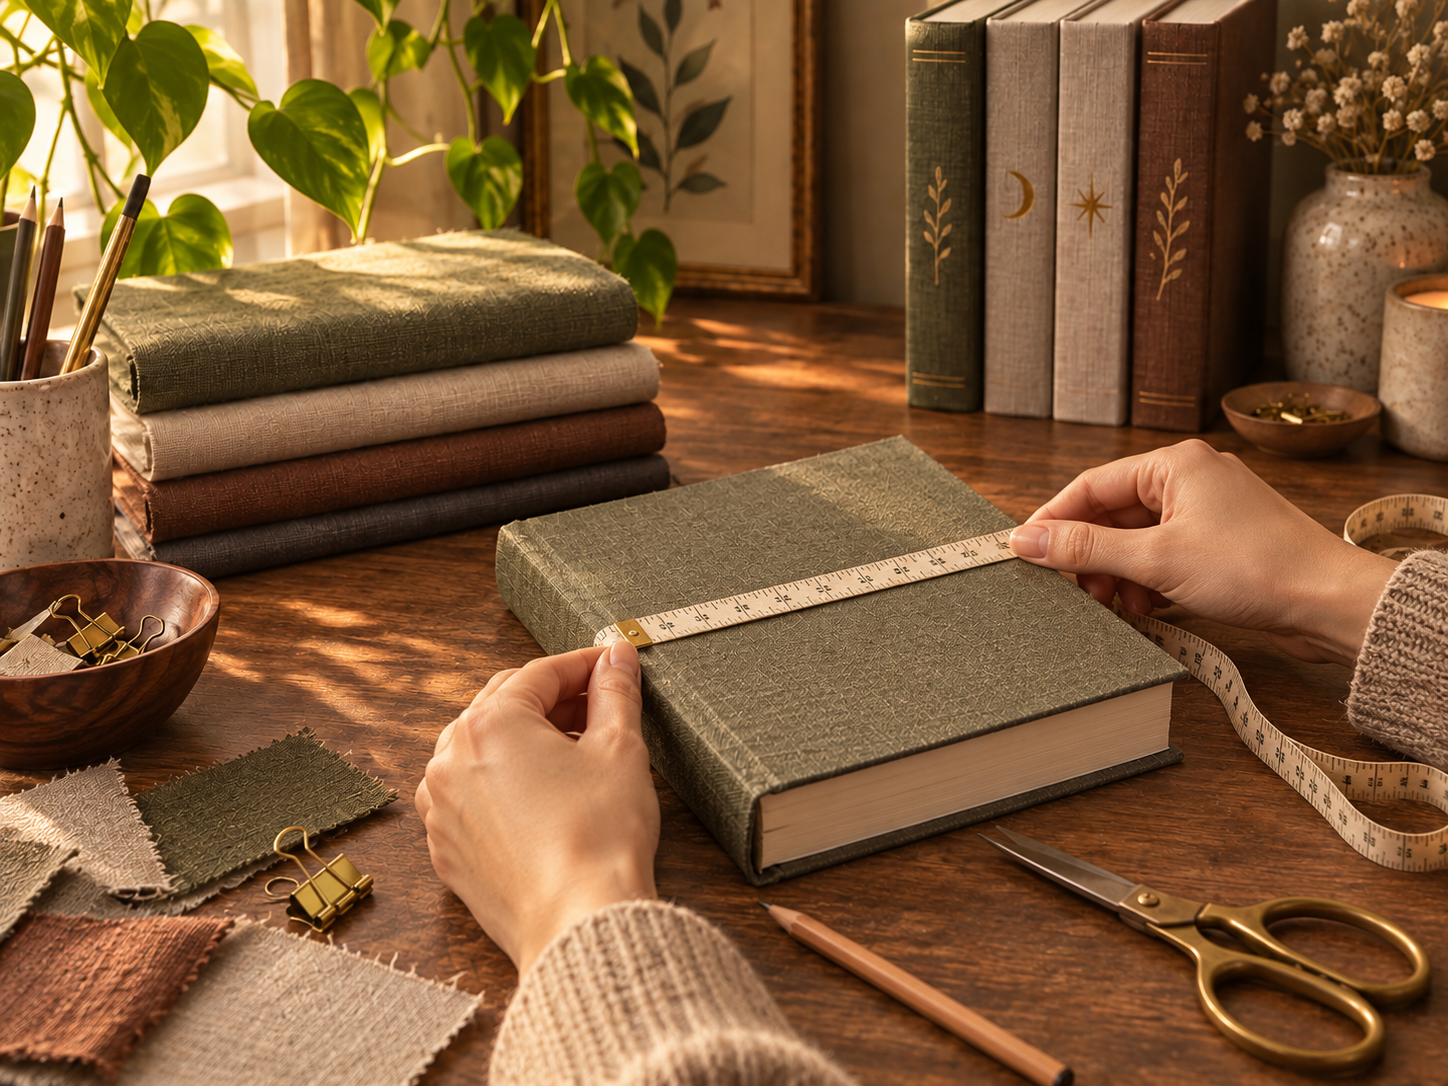
Measure the height of the book, then the full width across the back cover, spine, and front cover. Add roughly 1½ to 2 inches of extra material around the outside edges so you have enough to fold neatly inside.
More is easier to trim. Less is very difficult to negotiate with.
If you are working through a whole shelf, measure each book rather than assuming they are close enough. Those small differences in height and thickness are what keep the finished shelf looking like real books.
3. Cut and dry-fit the material
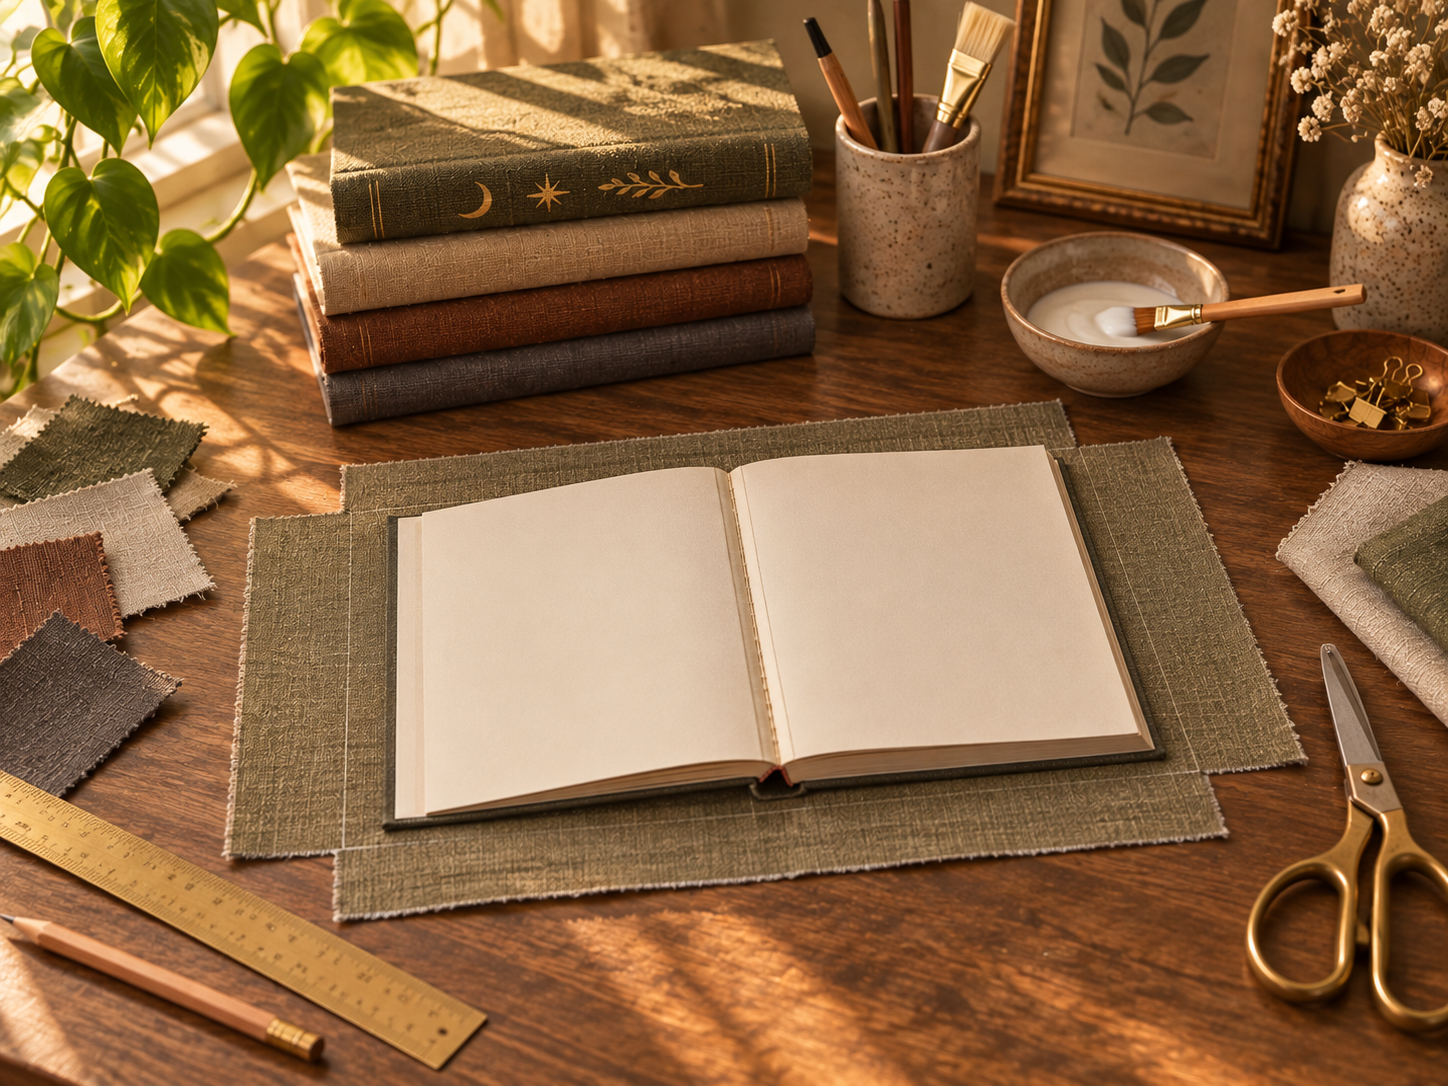
Cut one rectangle, place the book on it, and wrap it around before adding any glue. Check that the weave or pattern is straight, the spine is not pulling, and every edge has enough overlap.
Open and close the book once while everything is still dry. That little test shows you where the fabric naturally wants to move around the hinge before you commit it permanently.
4. Anchor the spine first
With the book closed, apply a thin layer of glue to the spine and center it on the fabric. Once that grips, work outward across the front and back covers, smoothing as you go.
Use less glue than you think you need. Too much can soak through fabric or leave ridges underneath it.
5. Fold the inside edges and corners
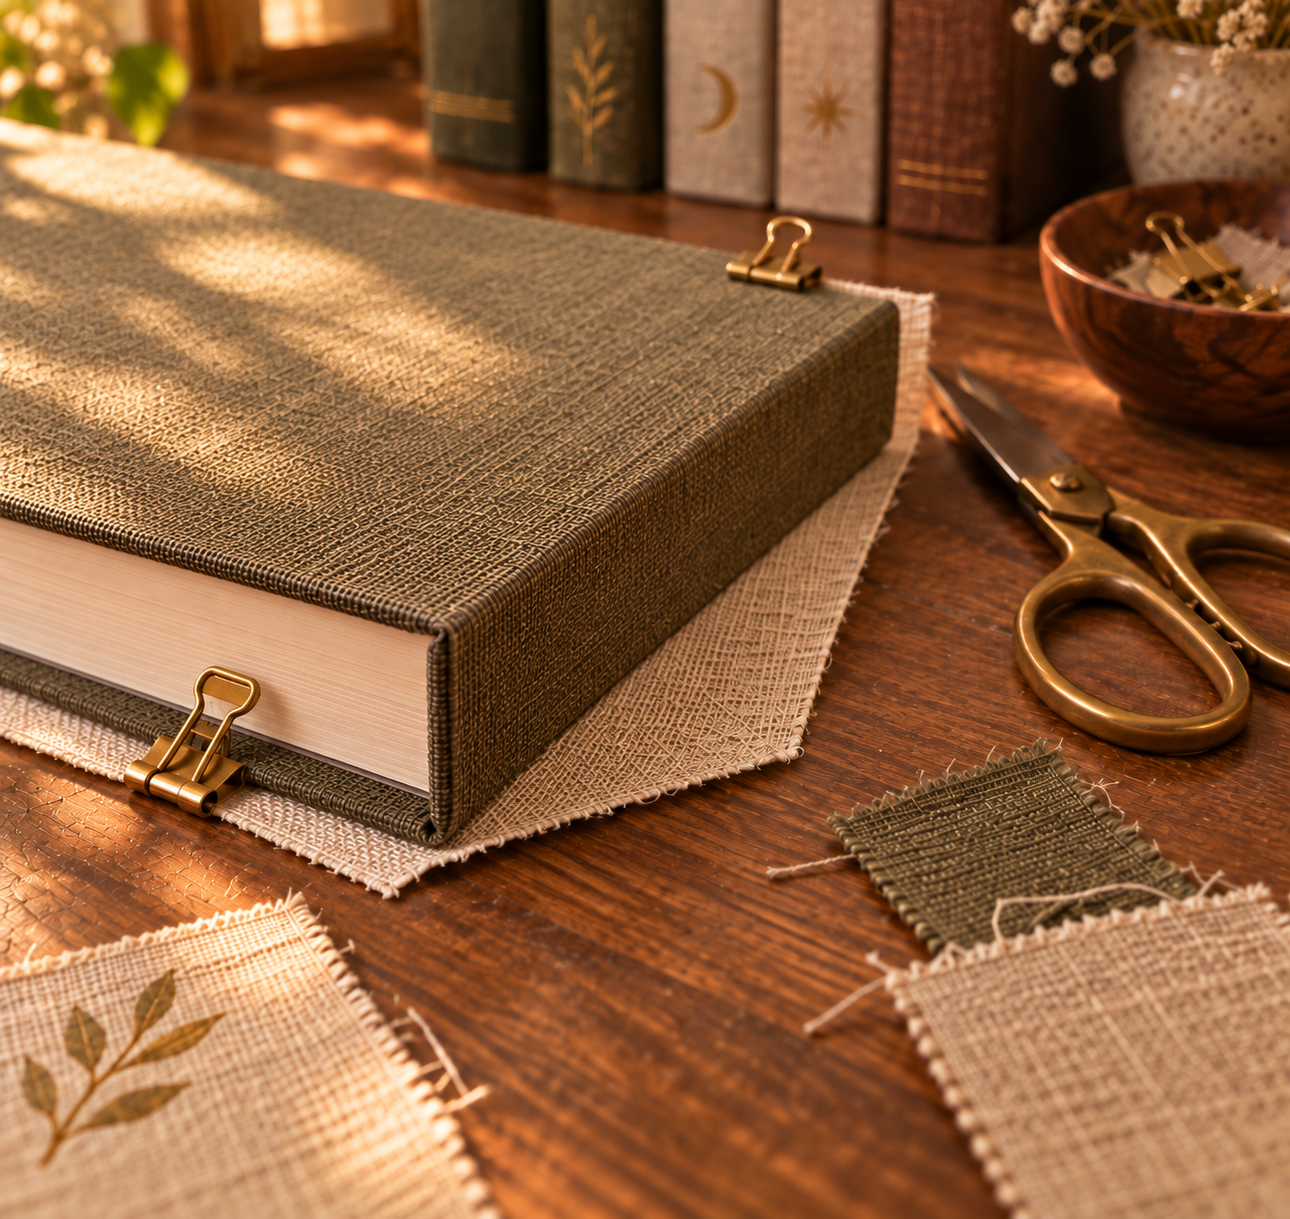
Fold the extra fabric over the inside edge of each cover and glue it down. At the corners, trim away a little bulk if needed and fold the material flat, much like wrapping a present.
Keep glue away from the pages and the flexible hinge beside the spine. The cover still needs room to open normally. Neat corners matter more than perfectly identical ones.
6. Add detail — or don’t
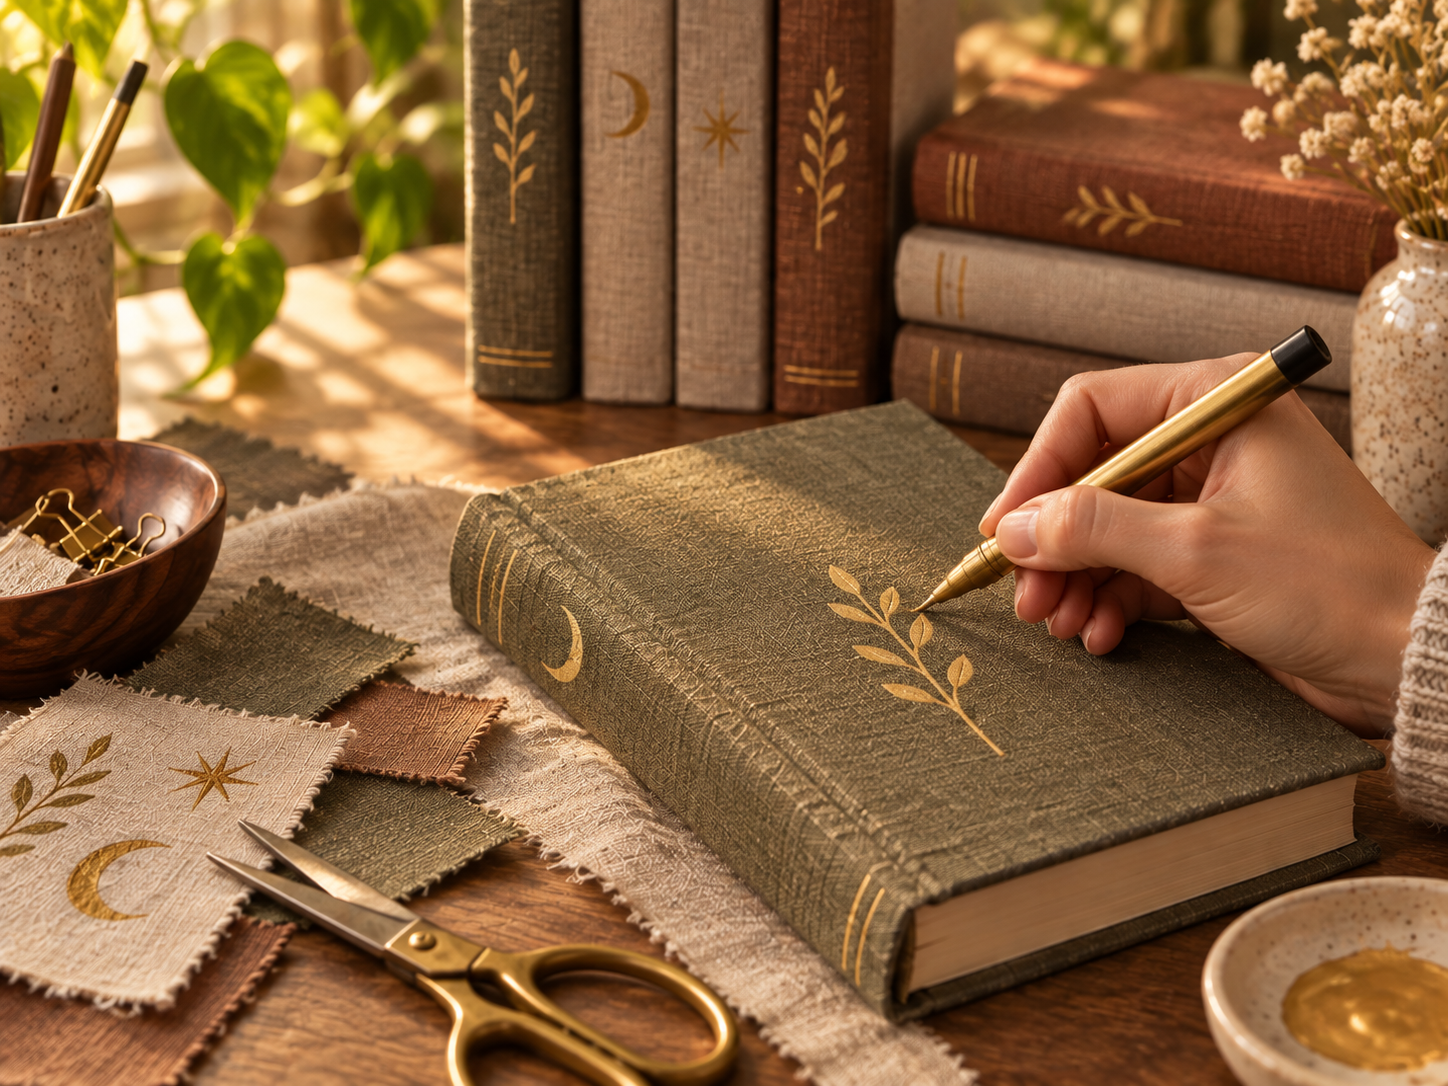
Once the cover is dry, a metallic paint marker is an easy way to add a little detail. Thin lines, a small botanical stem, a moon, a star, or a simple border are enough to make the book feel finished without requiring actual foil-stamping equipment.
Test the marker on a scrap first. Some open-weave fabrics drink ink much faster than others, and a practice line is considerably less dramatic than discovering that on the finished spine.
A note on choosing your style
Linen-wrapped books can go in several directions, and the best one is the one that fits your home.
If you like a softer, calmer shelf, keep the details restrained with simple linework, botanical motifs, or a little metallic accent. If you love an old-library or Victorian look, lean into it: decorative labels, faux gilding, elaborate borders, vintage-inspired titles, and richer ornament can make the books feel wonderfully collected.
And if your space is colorful, maximalist, cottagey, academic, whimsical, or eclectic, let the covers do that too. The goal is not to make every bookshelf quiet or neutral. It is to make the books feel like they belong in the room.
- Minimal gold linework
- Botanical or celestial motifs
- One small symbol per spine
- Muted solids with visible texture
- Vintage-style spine labels
- Hand-lettered titles
- Decorative borders or stamps
- Ribbon, embroidery, or faux gilding
You don’t have to use linen
Linen is beautiful, but it is only one version of the idea. The material changes the mood, the cost, and how permanent the project feels.
Brown paper bags or kraft paper
Cheap, warm, and wonderfully old-school. Leave it plain for a simple schoolhouse look or add handwriting, stamps, paint, or metallic details. It is also a good low-risk way to test the look before buying fabric.
Newspaper
Newspaper gives the shelf a graphic, literary, slightly academic feeling. Test it first: some newsprint transfers ink when rubbed or damp, so it may not be ideal for books that are handled constantly.
Quilted or padded fabric
Softer, cozier, and especially lovely for children’s shelves, reading nooks, journals, or keepsake books. The tradeoff is thicker corners, so trim folds carefully.
Cotton or quilting fabric
Usually cheaper and easier to find than linen, with far more pattern choices. Tiny florals, checks, stripes, botanicals, and muted prints can make the same project feel cottagey, playful, or maximalist instead of neutral.
Wrapping paper, handmade paper, maps, or printed ephemera
Paper is an easy temporary option. Maps, sheet music, botanical illustrations, old dictionary pages, and public-domain artwork can create a much more layered look. If you own fragile vintage paper, photocopy or scan it rather than sacrificing the original.
Linen beside kraft paper, patterned cotton, and uncovered books can feel far more natural than wrapping everything in the same fabric. Linen feels soft and grounded. Kraft feels nostalgic. Newspaper feels literary. Quilted fabric feels cozy. Patterned cotton can be as playful as you like.
Style the shelf around the books you actually use
Put the books back where they are useful, then look at the shelf as a whole. Vary heights and thicknesses, mix covered and uncovered books, and leave a little breathing room where you can. The asymmetry is part of what makes a shelf feel lived-in instead of staged.
The point is not a perfect bookshelf.
You do not need matching books, a brand-new shelf, or a room stripped of color to make a collection feel intentional. Sometimes the answer is simply giving the things you already use a little more visual connection to the room around them.
That might mean linen and tiny gold stars. It might mean brown paper and handwritten labels. It might mean floral cotton, old maps, or gloriously ornate faux-gilded spines.
The point is not to make your bookshelf look like someone else’s. It is to let the useful things in your home look like they belong there, too.